The popular
Crouton script, which enables you to run
Ubuntu Linux alongside
Chrome OS can be used simply to run secure shell (
SSH) and X Windows and this can all be done without the virtual display switching keystrokes CTRL-ALT-F3. I tried the script and really didn't want a second environment to switch to and from. Considering that Chrome OS uses
Linux and
X Windows, I should be able to display
X Windows on the same display as the Chrome browser. This is possible and easy to do but you will find issues along the way. Getting an X Window application displayed alongside the Chrome browser is possible as seen below.
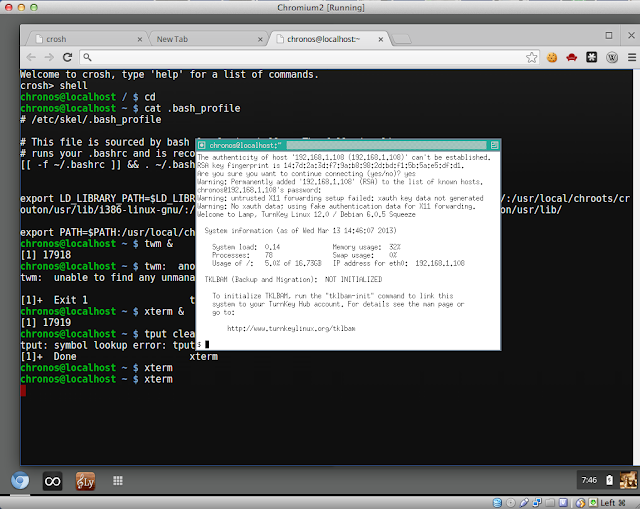 |
| Chrome OS Running Xterm and Twm |
Follow the instructions to install Crouton on your Chromebook. I am using
Hexxeh's build in a
virtual machine. Add
Tom's Window Manager (twm) window manager since the Chrome OS window manager won't manage X Window applications other than the Chrome browser itself. Then you'll need to set the
PATH and
LD_LIBRARY_PATH variables to point to the libraries needed for twm and
xterm. You can view my bash_profile changes
here. Note that I named my
chroot crouton not
precise, so you will have to use the right name for you in the variables and also note that the chroot environment is not encrypted.
This setup is only so I can use SSH and X Windows to remote machines. Many other applications are expecting config files in /etc which would use the Chrome OS /etc which doesn't support them. It is possible to compile the binaries so they use /usr/local, like other operating systems do, but I just needed those two functions without switching windows to a whole new environment. It is possible that someone might make a project to use the native non-chroot environment, but that would require making packages just for native usage and why bother when you can piggy back off of the work done for Ubuntu?
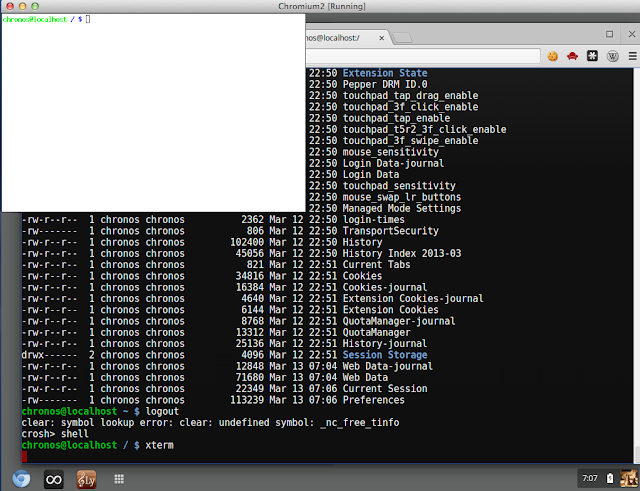 |
| Unmanged xterm on Chrome OS |
The picture above show the xterm session isn't attached to a window manager. I ran 'twm &' so the X Windows applications could be managed. They can be minimized, maximized, and moved around with ease. Note that with two window managers running, I don't get twm menus but that is okay since I only want basic X window and SSH functionality.
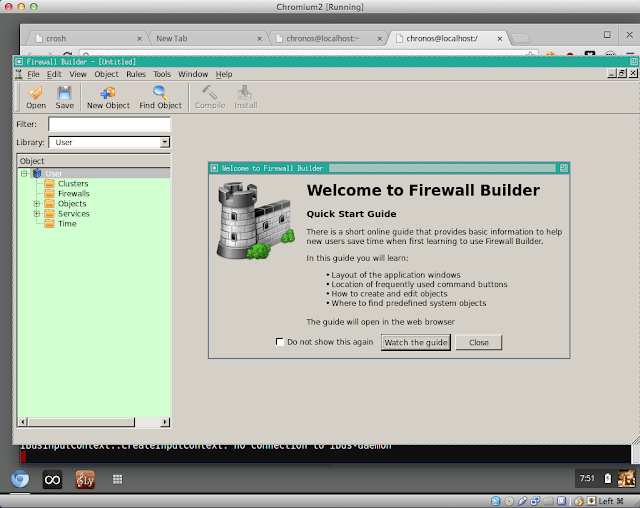 |
| Firewall Builder Displayed in Chrome OS |
You can also run ssh remotely and bring up windows from other servers, which is what I was hoping to do. To do that, note that there are no
magic cookies (i.e. no .Xauthority file) so SSH will refuse to work. I just cheated and issued an "
xhost +" to enable access. You can see
Firewall Builder up and running from the remote server but it is not possible to tell that it is was started remotely so you'll have to take my word for it.
Here are some important in-between steps captioned to explain what they are for.
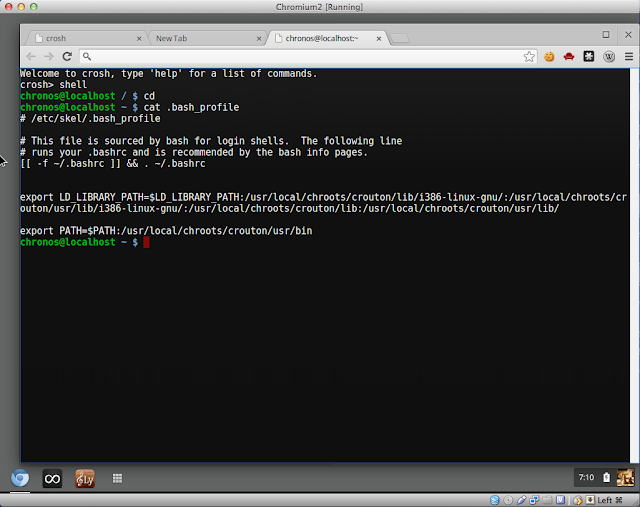 |
| PATH and LD_LIBRARY_PATH settings for Chrome OS |
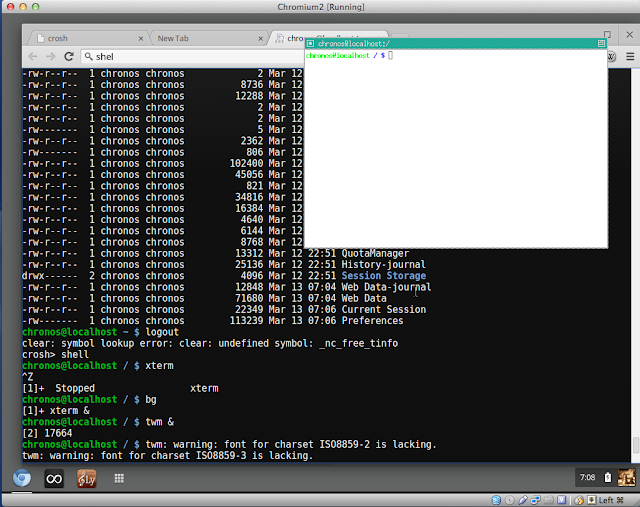 |
| Start twm and xterm in Chrome OS |
What isn't depicted, is the "sudo apt-get install twm" command done while in the chroot environment. Twm is made available in /usr/bin from the
apt instaalation. So, you must have entered the chroot before running the install command for twm.
Acquiring a cheap Chromebook to run Linux on is a popular idea. But I already have three other physical machines with Ubuntu, so I don't need another one. I wanted a lightweight device to do remote work into my other Ubuntu machines and enabling X Windows applications to display on Chrome OS was enough for me but your mileage and needs may vary.


